
I have now made one for every holiday. The last one I needed was for Valentine's Day and that is now a "fait accompli". In a way, I am a bit sad as I really enjoy making these but hopeful that a new craft might soon strike my fancy.
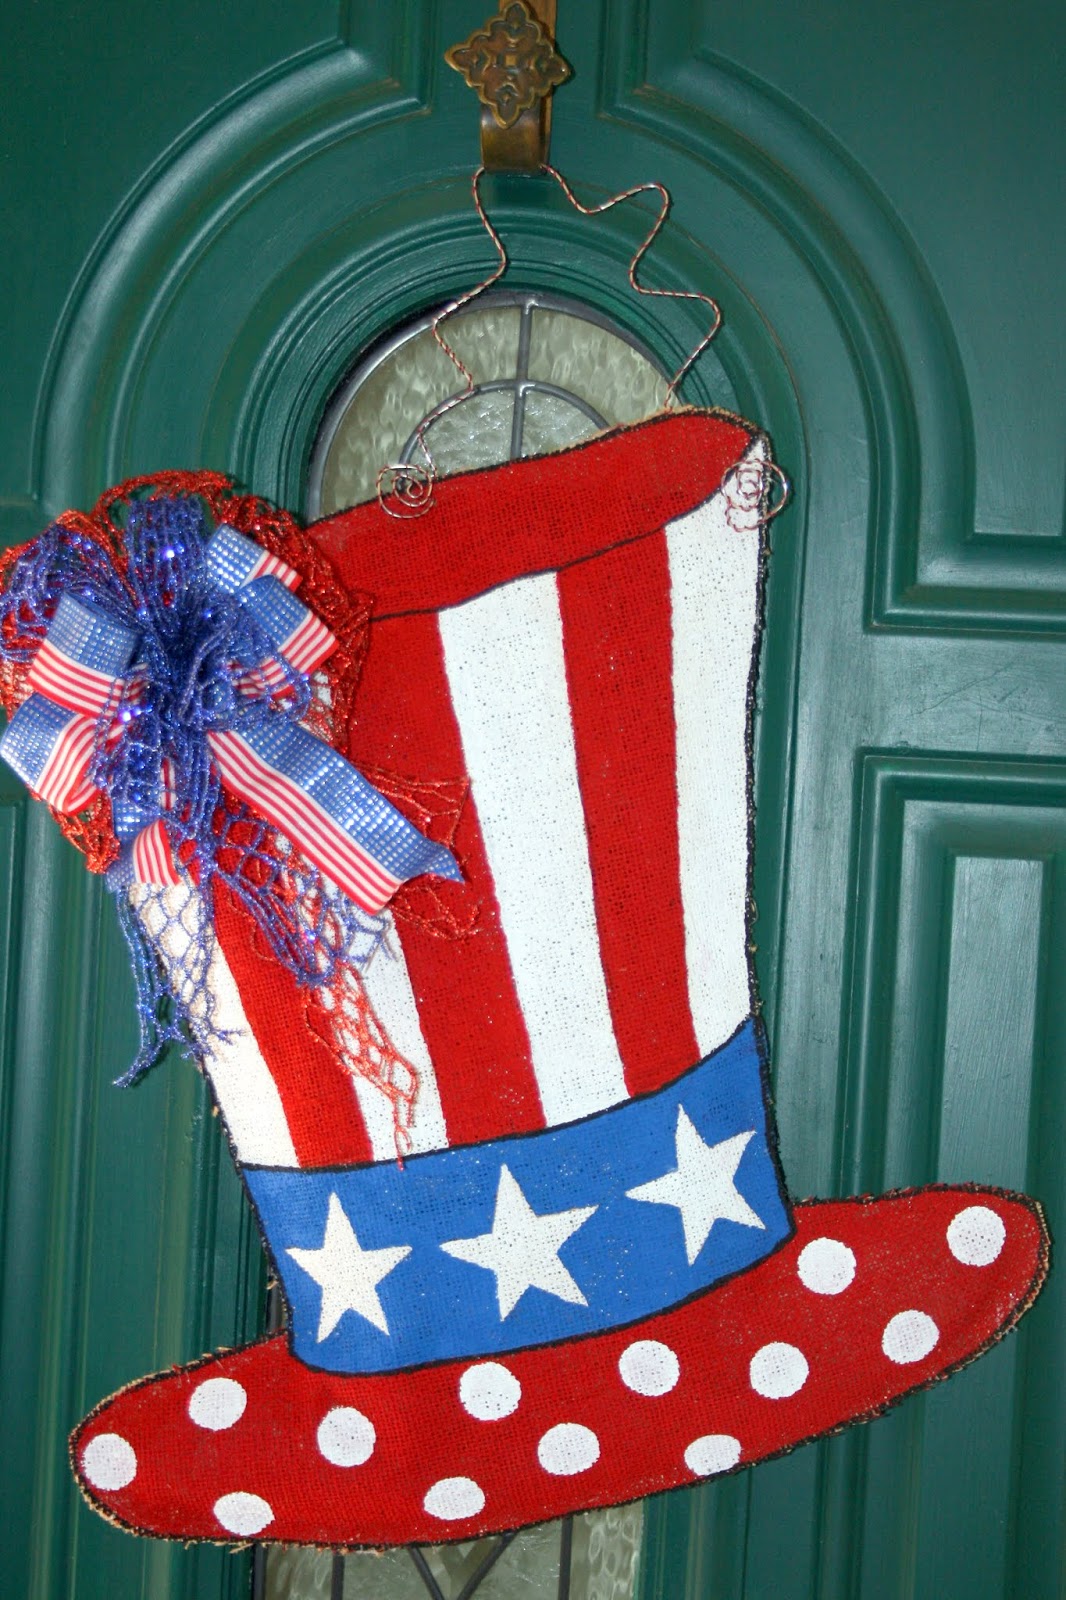
This was actually one of my easiest hangers. The shape is simple, painting was a no brainer and the gluing and stuffing was the easiest so far. I did think about all sorts of patterns using words, swirls, flowers, etc. but I just kept going back to the red, white and black basics. If the darn burlap wasn't so difficult to paint crisp lines on, I might honestly have tried. But, once you make a mistake on this stuff, it is extremely hard to correct and the nap takes your paint brush bristles places you don't want them to go before you even know it is happening!. You can attempt to paint over it but that just makes that area look darker and there is no going back-ask me how I know. Lol Here is the newest addition and a look back at the previous ones.


This one really doesn't need a tutorial but, since I took the pictures, I'll show you the very simple steps. This was my first gathering of supplies but then I did run out and buy more ribbon, paint and burlap.

Once again, I was reminded that there are differences in burlap. I definitely prefer the one carried at HL over JoAnns. That being said, I had enough left from previous projects to make 2 more hangers and that burlap was definitely a tighter weave than the one available right now. It's not a problem but the tighter weave not only doesn't soak up as much paint but it doesn't have the areas where you can literally see through the fabric. The coat of clear sealer that I always start with helps fill in the holes a little and then 2 coats of paint help but there are still some gaps. Definitely not a big deal but it does make the color of the bags you use for stuffing that much more important. The white Target bags are a total "no go" for this project.

I kind of gave myself a paint line and got started.

This is after 1 coat. The one coat used 1 1/2 small bottles of craft paint!!

This is after coat #2 and you can still see through in some spots but I figured that the white dots would distract your eye from any imperfections. I will say that it has been so long since I made my last door hanger that I forgot something really important. I couldn't understand why it was taking me SO long to get it painted. It wasn't until I had finished the first one that I remembered that I only use my angled brush along the edges and that I use the inexpensive bristled brush-that I cut very short-to "scrub" in the paint on the rest of the surface. It not only uses a bit less paint but goes much more quickly! Glad I remembered before I finished them all!

I just kind of used the width of the brush for this pattern and I was lucky that it sort of worked out perfectly. If you look closely, you will see some of the stripes are slightly different sizes to fit. On the remainders, I just put the "adjusted" stripes up in the left hand corner where I know the bow will cover them.

The dots are the easiest of all because they go on perfectly with a foam dauber.

And here we are. I am really not the world's best bow maker but being that I hot glue these bows on, I can usually get them just where and how I want. The glue helps me cover a multitude of errors!

I only have one completely finished but I'm hoping today will see the others all painted. This hanger takes 28 bags to stuff it well and even after begging bags from everyone I can, I am still about 50 short so I guess I will be "dumpster" diving at Publix tomorrow!
And, since I had to make a supply run, I started picking up some things for our Valentine weekend at Nana's. Plans are in the works! Stay tuned.

And yes, there is a bit of St. Pat's starting to creep in-when you see it, you have to buy it!
No comments:
Post a Comment