
I am busy making shamrocks. And, this time, they are not made from a fence slat, cardstock, fabric or any of the other supplies I have used of late. This time it is the REAL thing!
A number of years ago, daughter #2 gifted me with a shamrock plant for St. Patrick's Day. And, I may have bought one for myself somewhere along the way. And yes, I probably planted them somewhere in my yard after the holiday. But, that is it. And somewhere between those long ago occurrences and now, shamrocks just pop up and bloom all over my yard. A lot of times, they are pretty where they are growing and I leave them alone. Other times, they are in very hard to get at places and I would probably destroy them if I tried to transplant and so, I leave them alone. But, many times they are just there for the asking and this is the time of the year that I start "making" new plants.
If the truth be told, I should start about a month ago...and, I did for some. But, for whatever reason, I was out in my yard today and my "new eyes" looked at my potting bench. I found a really pretty metal container that has verdigrised and is so beautiful that I just had to clean it up and bring it in. And then, I found a few green flower pots and I wondered how they had escaped my gaze for use for St. Pat's. And so, they all came in.
The metal container - footed urn - will have no trouble finding a home and will probably stay out through many of the next holiday decors and, the flower pots were screaming "shamrocks"!
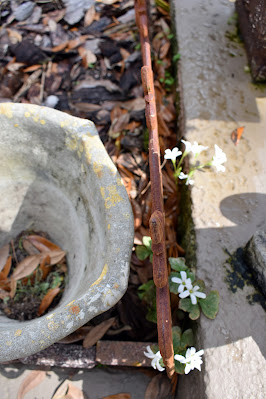
The process is definitely not pretty. And, I don't even know if I do it correctly. But, this is how I do it and I get new shamrock plants every year so, it works for me. First. I go around my yard and find as many blooming plants as I can.

It can be a tricky task to get them out of the ground unharmed. They grow from tubers that are usually very shallowly in the ground and if you have mulch in your garden, it is hard to safely extricate the very delicate stems. I always lose some in the process but that is OK. The others will more than make up for it. Once I have as many as I want, I put them in my pot and loosely fill with potting soil and some Osmacote. All of the plants in the middle of this pot are covered with the soil but that is OK.

Next, I put the pot in my sink and use the sprayer to very gently spray over the entire dirt area. I will actually leave the pot there and go back and do this many times until I am sure the soil is tamped down enough and the entire pot is saturated.

This is when I move it out into my sunroom where it will get morning light. I will also make sure to keep it very damp for a few days after this process so it doesn't go into shock. It still doesn't look pretty - yet. But, with some patience, I will begin to see some new growth each day.

And, before I know it it will look like these beauties.


And, once I have replaced the shamrocks with Easter plants, I will put these into the ground yet again and wait to see how many new plants I can make next year! It feels good to be Mother Nature. Now if I could just do something about our temperatures! Lol Stay safe and stay tuned.
Just a little addendum: I didn't get this posted yesterday so I thought I would show you an update. It has truly been less than 24 hours and you can see that the shamrock is already starting to come to life!

No comments:
Post a Comment