OK. I knew I couldn't stick to that "less is more" axiom for very long. That is just not in my genetics! And so, once again to avoid a chore I didn't want to do, I found myself dragging out craft supplies and flying "blind".
I had found a few downloads for Easter that I liked and they were just sitting there screaming "use me, use me". What was I to do?
Since I had a stack of things I bought to have on hand, I found that an 8X10 canvas would work perfectly for one of the prints but, the other would need me to make a pallet. Then, when I measured the 2nd print I found that once again making a pallet would be harder than I wanted because of its unusual size and my unusual sized wood. That is when I remembered that part of my stash included some $ Tree Valentine signs that I bought specifically to use the back. I have never tried that - and I will tell you what I learned in a minute - so I grabbed one up and pulled out my trusty friend, my miter saw.
It was one simple cut and I had the size I needed.
I knew I would be using the back so I wasn't so bothered with this being on what would become the new back but, I did want to cover it a bit because I'm not sure where I will be using this sign and if the back might show a bit...and so, I just gave it a quick sanding (I did find out that if I ever had to use this side it will take much more than a quick sanding to get that glitter off!) and a coat of "plaster" chalk paint.
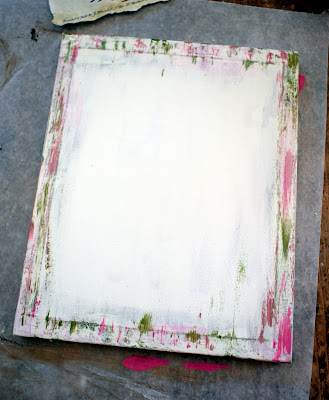
Then I did the usual...a bit of painting around the edges of colors that are in the print so that I can sand down and get it chippy and weathered looking and then a coat of the main color.
Once this was dry, I would normally sand at this point but, for whatever reason, I didn't do that this time. I went ahead and Mod Podged the print on to the backing and then used a brayer to work out all of those wrinkles.
This is when I discovered that I am not going to be a fan of using this backing for this paint process any more because, I guess, it not being real wood and having the thickness of real wood, when sanding this board all of the paint layers came off at once and it went right back down to the brown base color. Fortunately, this print was already distressed with various colors so I just went a head and sanded some places a bit more and came back with some layers of the green, orange and brown. Luckily, I love the old, chippy, peeling, distressed look of many years of weather so I am fine with it but, I'm not sure I will use these boards any more when I am using this technique. It just works so much better with real wood. I guess you get what you pay for. Lol
All of that being said, I do love this sign. I love that bunny face and I love the colors. And, if I remember correctly, I went on a carrot binge last year and kind of made my family room the carrot farm so this should complement that just perfectly!
And then going with my "more is more" theory, I moved on to the other print. It is a bit more vintage Victorian so it will probably go in the other part of the house decor. This one was going on a $ Tree canvas and, I learned something else. I have used these canvases for other techniques and they have been fine but, once again, they don't lend themselves to the sanding part of this process. The canvas itself that is stretched across the frame is noticeably thinner than the canvasses from HL or Michaels that I usually use. And so, when I started sanding, I got my different colors but the wood frame definitely showed through. As it turned out, it was fine because my print pretty much went all the way to the edges of the canvas but, if I had had more room around the edges, that wood line showing would have bothered me a lot!
Again, some Mod Podge and a bit of touch-up and it is good to go. Again, I don't like it as much as if it would have been done on wood but, since I was just going with what I had, I'm OK with it...and I didn't have to think about that chore.
Of course, that was yesterday and "that" chore is still waiting - no little elves came during the night and did it for me - so I am off. Stay safe and stay tuned.


No comments:
Post a Comment