decorating with dodi

Follow on Bloglovin

Monday, February 28, 2022

The Making of a Shamrock

 I am busy making shamrocks. And, this time, they are not made from a fence slat, cardstock, fabric or any of the other supplies I have used of late. This time it is the REAL thing!

A number of years ago, daughter #2 gifted me with a shamrock plant for St. Patrick's Day. And, I may have bought one for myself somewhere along the way. And yes, I probably planted them somewhere in my yard after the holiday. But, that is it. And somewhere between those long ago occurrences and now, shamrocks just pop up and bloom all over my yard. A lot of times, they are pretty where they are growing and I leave them alone. Other times, they are in very hard to get at places and I would probably destroy them if I tried to transplant and so, I leave them alone. But, many times they are just there for the asking and this is the time of the year that I start "making" new plants.

If the truth be told, I should start about a month ago...and, I did for some. But, for whatever reason, I was out in my yard today and my "new eyes" looked at my potting bench. I found a really pretty metal container that has verdigrised and is so beautiful that I just had to clean it up and bring it in. And then, I found a few green flower pots and I wondered how they had escaped my gaze for use for St. Pat's. And so, they all came in.

The metal container - footed urn - will have no trouble finding a home and will probably stay out through many of the next holiday decors and, the flower pots were screaming "shamrocks"!

The process is definitely not pretty. And, I don't even know if I do it correctly. But, this is how I do it and I get new shamrock plants every year so, it works for me. First. I go around my yard and find as many blooming plants as I can.


It can be a tricky task to get them out of the ground unharmed. They grow from tubers that are usually very shallowly in the ground and if you have mulch in your garden, it is hard to safely extricate the very delicate stems. I always lose some in the process but that is OK. The others will more than make up for it. Once I have as many as I want, I put them in my pot and loosely fill with potting soil and some Osmacote. All of the plants in the middle of this pot are covered with the soil but that is OK.

Next, I put the pot in my sink and use the sprayer to very gently spray over the entire dirt area. I will actually leave the pot there and go back and do this many times until I am sure the soil is tamped down enough and the entire pot is saturated.

This is when I move it out into my sunroom where it will get morning light. I will also make sure to keep it very damp for a few days after this process so it doesn't go into shock. It still doesn't look pretty - yet. But, with some patience, I will begin to see some new growth each day.

And, before I know it it will look like these beauties.


And, once I have replaced the shamrocks with Easter plants, I will put these into the ground yet again and wait to see how many new plants I can make next year! It feels good to be Mother Nature. Now if I could just do something about our temperatures! Lol Stay safe and stay tuned.

Just a little addendum: I didn't get this posted yesterday so I thought I would show you an update. It has truly been less than 24 hours and you can see that the shamrock is already starting to come to life!



Sunday, February 27, 2022

Happy Number 17!

 Today is my oldest grandson's seventeenth birthday. He is our fifth grand child and the first for daughter #3. This daughter started her family at an older age than her sisters so I have always thought of her three as my "young ones". Guess those days are pretty much over. If Har is 17, then his brother will be 15 and his sister will be 13 this year! Seems like just yesterday that I was watching him being born. Where do the years go?

In any case, now that he is so grown up, his birthday celebration tastes have grown as well. He is once again choosing Ipanema for his birthday dinner. It is a Brazilian steakhouse and, even though I don't eat meat, I have no problem eating in this restaurant. They have the most incredible "salad" bar I have ever seen. While everyone else goes for one trip and then relishes all the the carved meats that continually come to the table, I am busy beating a path back and forth to that bar. To call it a salad bar is really a disservice because it is loaded with hot food as well and, if I play my cards right, I'll be full for a few days. Lol


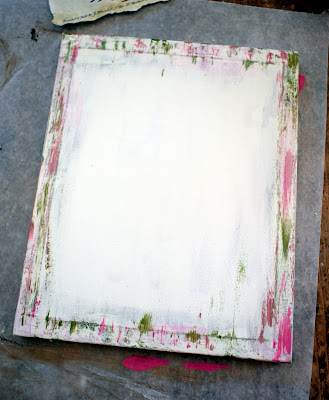
In any case, until I have to get ready to head over to their house for gifts and festivities before dinner, I am having a pretty lazy day...which, for me, can sometimes translate as boring. And so, I found myself picking up another piece of my old fence and looking at it for inspiration. Since I have been seeing the darn carrots everywhere again this year, that was my inspiration this time. I am starting with a totally blank slate...straight off of my fence and cut to size.

I gave it a quick sanding and then pulled out some colors I thought I might use. I started by just layering on different shades of green before dry brushing on the chalk color chalk paint. This time I was just going for some colors peeking through the top coat - no sanding involved.


My plan was to paint one carrot but that just didn't seem to fit right so I went for the three thin carrots that are on so many napkins, plates and fabrics this year. Since the thin carrots are often mis-shapen in real life, I had no qualms about the way I painted them...these were kind of a no-brainer.

Then, I added the green tops and a messy bow but it still didn't look finished so I went back in with some antique wax and added detail on the carrots and greens and then muted that down a bit with more paint. This could have gone on until I had 2" of paint built up so, I stopped where I was. 


Considering that we're talking about three carrots painted on a free old fence board with paint and ribbon I already had, I am good with it. It filled my time before heading to help Har celebrate and that had been my goal.


 It is now Sunday morning and I had hoped to have wonderful pictures of my evening that I could share with you because we sure took a boatload of them. Unfortunately, no one ever wants to take them on my phone...they prefer their fancy-schmancy phones...and that, of course, means I have to wait for them to get them to me. The ones that Har's girlfriend took and sent are super blurry but they're all I have right now. The ones from the restaurant are on daughter #3's phone so I will share when (if) they ever come through. Lol


 I've got a fun, busy week ahead of me but I will be back to share. Stay safe and stay tuned.


Wednesday, February 23, 2022

If I Was a Betting Woman...

 Those of you who know me would have lost a bet if you bet that this wouldn't happen! Lol As much as I "say" I won't rush the season, once we get temperatures into the 80s and I want to be outside, I know full well that I won't be out there if I have to look at dead leaves and droopy plants. We really only got a few nights that it got really cold but, for the things I didn't cover or were not up against the house, I did lose leaves. Everything will come back but until it does, things were looking rough...and so, this happened.

That was all six of the yard debris cans that I have or there would have been more! I got a good start but have been losing the battle against the oak leaves of late. They are coming down way heavier than they usually do and it is an uphill battle but I try to fill a few cans every chance I get. 

I was just out cleaning the fountains and I realized that the pollen is now upon us as well. Spring, spring, beautiful spring! Lol I truly just wish all of the leaves would fall at once and we could get it over with. Why doesn't Mother Nature listen?!

And now I am back in the house for a bit so I thought I would take you into the dining room. I think except for changing the wood tag on the urn, things in this room are pretty much as they were last year. I need some new St. Pat's ideas!


Every time I put out this table runner from HL, I am so thankful that I grabbed it. Sometimes things in HL look like what you pay for them but this runner, in my opinion, looks so much more expensive. It really looks like a fine Irish linen with a delicate embroidery.


So that's the tour for today. As much as I really would like to sit and put my feet up the rest of the day, I am off to dust and Swiffer. As I said, I didn't realize that the pollen had arrived. Guess I should have looked a little more closely at my glass coffee table and wood floors in my living room after having the windows open all day yesterday! Yikes. Note to self...keep the windows closed for awhile! Stay safe and stay tuned.


Sunday, February 20, 2022

More is More!

OK. I knew I couldn't stick to that "less is more" axiom for very long. That is just not in my genetics! And so, once again to avoid a chore I didn't want to do, I found myself dragging out craft supplies and flying "blind".

I had found a few downloads for Easter that I liked and they were just sitting there screaming "use me, use me". What was I to do?

Since I had a stack of things I bought to have on hand, I found that an 8X10 canvas would work perfectly for one of the prints but, the other would need me to make a pallet. Then, when I measured the 2nd print I found that once again making a pallet would be harder than I wanted because of its unusual size and my unusual sized wood. That is when I remembered that part of my stash included some $ Tree Valentine signs that I bought specifically to use the back. I have never tried that - and I will tell you what I learned in a minute - so I grabbed one up and pulled out my trusty friend, my miter saw.

It was one simple cut and I had the size I needed.


I knew I would be using the back so I wasn't so bothered with this being on what would become the new back but, I did want to cover it a bit because I'm not sure where I will be using this sign and if the back might show a bit...and so, I just gave it a quick sanding (I did find out that if I ever had to use this side it will take much more than a quick sanding to get that glitter off!) and a coat of "plaster" chalk paint.

Then I did the usual...a bit of painting around the edges of colors that are in the print so that I can sand down and get it chippy and weathered looking and then a coat of the main color.


Once this was dry, I would normally sand at this point but, for whatever reason, I didn't do that this time. I went ahead and Mod Podged the print on to the backing and then used a brayer to work out all of those wrinkles.


This is when I discovered that I am not going to be a fan of using this backing for this paint process any more because, I guess, it not being real wood and having the thickness of real wood, when sanding this board all of the paint layers came off at once and it went right back down to the brown base color. Fortunately, this print was already distressed with various colors so I just went a head and sanded some places a bit more and came back with some layers of the green, orange and brown. Luckily, I love the old, chippy, peeling, distressed look of many years of weather so I am fine with it but, I'm not sure I will use these boards any more when I am using this technique. It just works so much better with real wood. I guess you get what you pay for. Lol

All of that being said, I do love this sign. I love that bunny face and I love the colors. And, if I remember correctly, I went on a carrot binge last year and kind of made my family room the carrot farm so this should complement that just perfectly!


And then going with my "more is more" theory, I moved on to the other print. It is a bit more vintage Victorian so it will probably go in the other part of the house decor. This one was going on a $ Tree canvas and, I learned something else. I have used these canvases for other techniques and they have been fine but, once again, they don't lend themselves to the sanding part of this process. The canvas itself that is stretched across the frame is noticeably thinner than the canvasses from HL or Michaels that I usually use. And so, when I started sanding, I got my different colors but the wood frame definitely showed through. As it turned out, it was fine because my print pretty much went all the way to the edges of the canvas but, if I had had more room around the edges, that wood line showing would have bothered me a lot!


Again, some Mod Podge and a bit of touch-up and it is good to go. Again, I don't like it as much as if it would have been done on wood but, since I was just going with what I had, I'm OK with it...and I didn't have to think about that chore.


Of course, that was yesterday and "that" chore is still waiting - no little elves came during the night and did it for me - so I am off. Stay safe and stay tuned.

Saturday, February 19, 2022

"Jigging" Into the Kitchen

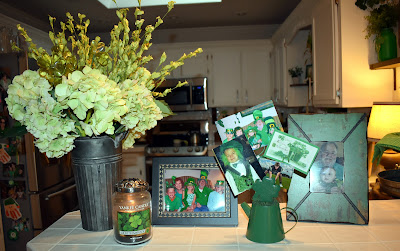
I know St. Pat's is still a month away but, since I have all of the decor up and ready - and, before it gets dusty and needs to be cleaned...Lol - let's head into the kitchen. I actually changed a few things up in there.


No matter how many time I tackle those finger prints, I never remember to do it right before snapping pictures...sorry.


Since I now have the dish and hand soaps on the right of the sink, I am left with a blank spot right in front of the very unattractive electric plug. I thought I would put the new St. Pat's Mason jar arrangement there, but I like it up on the shelf so I moved over the cutting board with the small shamrock wreath and all is good.

I really like the way the shelf is looking now. I found that very straggly branch of shamrocks at $ Tree. It is the only one they had left and is missing a few leaves but I actually grabbed it to use the individual shamrocks as embellishments. Since I haven't needed them for that just yet, I stuck them in the jar and I'm fine with that.


 So that is the kitchen for this year. I can't say it enough...I love the green. It feels like I have brought the outside in and, at least for me, it is very calming. It makes me happy to know that the green will be around for a long time to come. I use mostly the light greens and violets for Easter and then the same light greens with a few other soft colors thrown in for spring and then the greens will also pop back up for August (against the sunflowers). Ahhhh, I have much to look forward to. Lol Stay safe and stay tuned.