By the time this virus is over, I will probably have been moved to try every craft I happen upon...no matter what. I have always felt like if something was worth doing, it was worth doing correctly...with worthwhile supplies. But, alas, I have been driven to trying some of the $ Tree crafts that are all over the FB craft sites that I follow. I really can't believe I have "stooped this low"...LOL
I'm totally blaming it on the virus. I need to stay busy and crafting is my "happy place". And so, with this in mind-with NO judgement-, I ventured into the ugly $ Tree tinsel realm. For over a year, crafters have been buying the $ Tree holiday tinsel decorations and reinventing them. The problem is that, no matter what you do, you still just have a very inexpensive plastic frame and it really is hard to reinvent it into anything other than that.
But, I will admit, I caved. Since I love decorating for St. Patrick's Day so much...and it is hard to find new ideas...I bought a tinsel covered leprechaun hat and tried out an idea I found on "The Crafty Decorator". If I am being totally honest, I didn't use exactly the same supplies that she used so, maybe that would be the reason I had so much trouble. Let's just say that in order to do this project to my satisfaction - which just means that there will be no evidence of what it started as - I used 7 glue sticks and, even with using my silicon finger protectors, I have many blistered fingers! Also, the end result is far from perfect but, I think when I display it, I might put it on a candle holder in a group of candles so it might work out OK...especially if it is in a very distant, inconspicuous place. Lol You be the judge.
Not only did I buy the hat but, I saw the green yarn and thought that I might like that better than twine...and, it would save the painting step.
The first step is always to remove the tinsel. Everyone who does this says how difficult it is and that you end up having to cut the tinsel into little pieces. I don't know if mine was strung differently but I easily got mine off-and, all in one piece so that I can possibly use it on another craft in the future. I don't use tinsel often but, maybe for Christmas.
The next step is to glue on some felt to the hat brim and top. That way, you have a flat surface for your hot glue. It is only needed in these two areas. Once you get to the main part of the hat, you can just twist it around and apply a small drop of glue every now and then.
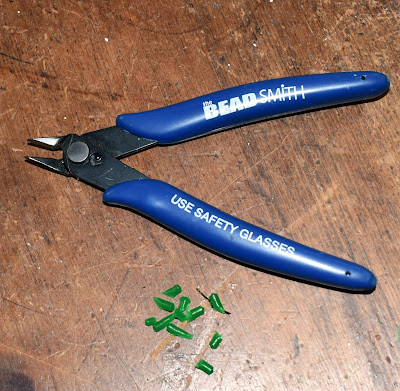
Since I have these "button shank removers", I decided it would make gluing easier if these little knobs that protruded were removed.
This is the last time you will see the yarn-at least on this project. The minute the hot glue hit it, it just kind of "smushed" and went flat...and all you could see was glue. It took me about 10 seconds to know this wasn't working. I have seen people successfully use yarn so, I'm wondering if it may be because this yarn is acrylic. I'm not sure, but it was a definite "no go"!
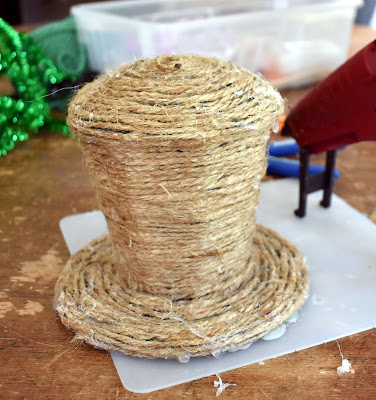
So, it was a default back to the twine. Fortunately, I always have twine. Unfortunately, I don't always have 6 ply - which is what I saw used. My 3 ply twine took so much more - both in quantity and patience...and, I guess time because this thing took forever to cover! I can not tell you how many times I almost called it quits. But, I am tenacious so I persevered!
This is where I broke for lunch and, apparently where I forgot to take any more pictures. I did pick up a very useful hot glue tip along the way. I never knew that if you run the hot tip of the gun (without pressing the trigger) along extra dried glue on your project, the heat will remelt the glue and, at least in the case of twine, it seems to melt the glue back into the fibers and you have a lot less mess. Scissors helped on those big "globs" that fell through on the bottom and, knowing that I was going to paint it helped reassure me that any gaps would also probably be hidden.
After the paint dried, I cut a piece of black crushed velvet for the brim and then reattached the gold buckle I had removed from the original hat.
I knew I wanted a shamrock on the brim. After trying to make a three dimensional one (very unsuccessfully I might add) from felt, I dove back into the archives and found an extra pin that my grand daughters and I made many, many, many years ago for all of the family, friends teachers, scout leaders, etc. I found the idea in a Martha Stewart magazine and used her free printable as well. The shamrock is simply a green bump chenille stem. It wasn't exactly what I had in mind but I love that it has a touch of sentiment and, honestly, I was OVER this project at that point Lol.
So the suspense is over...here it is in all its glory.
This is probably how I will display. I'm not sure where just yet but maybe in the very deep shelves of the TV unit. Lol
I know this is probably way more than you ever wanted to know about a $1 tinsel hat but, as they say, the end justifies the means. It is now time for lunch and so the day goes. Sorry to tell you but I will be back...stay safe and stay tuned.


No comments:
Post a Comment