decorating with dodi

Follow on Bloglovin

Friday, July 10, 2020

Ahhhh!

So this is usually the time of year that I begin to think that I may some day breathe again. It may sound silly to be saying that this year with all of the incredible uncertainty that we have around us, but once I make it through the 4th of July, I can trick myself into thinking that I have been to the top of the mountain and it is all downhill from here! And, for me, this year will be no exception. And so, as the 4th of July decor came down, so did my blood pressure. It is amazing how I can seem to trick myself into the same lull every year...sunflowers go up and autumn can not be far behind!

And so, with that, let's get the late summer tour started so I can believe it really IS happening! Lol


Of course I had to move the red, white and blue flowers so I just brought in some yellow mums that are still hanging around from last fall until I venture out again to buy some sunflowers.


When I looked at this picture of the first thing you see inside the front door, I realized that it kind of sets the theme for the whole decor...the wreath holds the sunflowers and the candle introduces the citrus colors that keep popping up as well.


The actual citrus fruit not only accentuates the citrus colors but also takes my mind to the Mediterranean which gives me license to then bring in all of my olive jars and urns and opens up the feel of those countries in the kitchen and dining room as well.


Let's just say it is a good thing that decorating is moving along so well because this most certainly is not! The rings are finally beginning to rust - some way more than others - but, that gives me hope for the rest. The one lid that is really rusty is the one I started with about 10 days ago and I had actually sanded it a bit. The others all seem pretty resistant but, they are going to have a picture glued over them so if I can just get the outer edges to turn, I will be happy. We shall see.


So there you have the beginning of our tour. I will be back with more. Stay safe and stay tuned.


Thursday, July 9, 2020

Patience is a Virtue!

Patience is a virtue...but, one that I am not always in possession of. I am one of those people who, once I have made up my mind to do something, I want to do it...right now...right away. And so, this project has been a bit of a challenge for me.

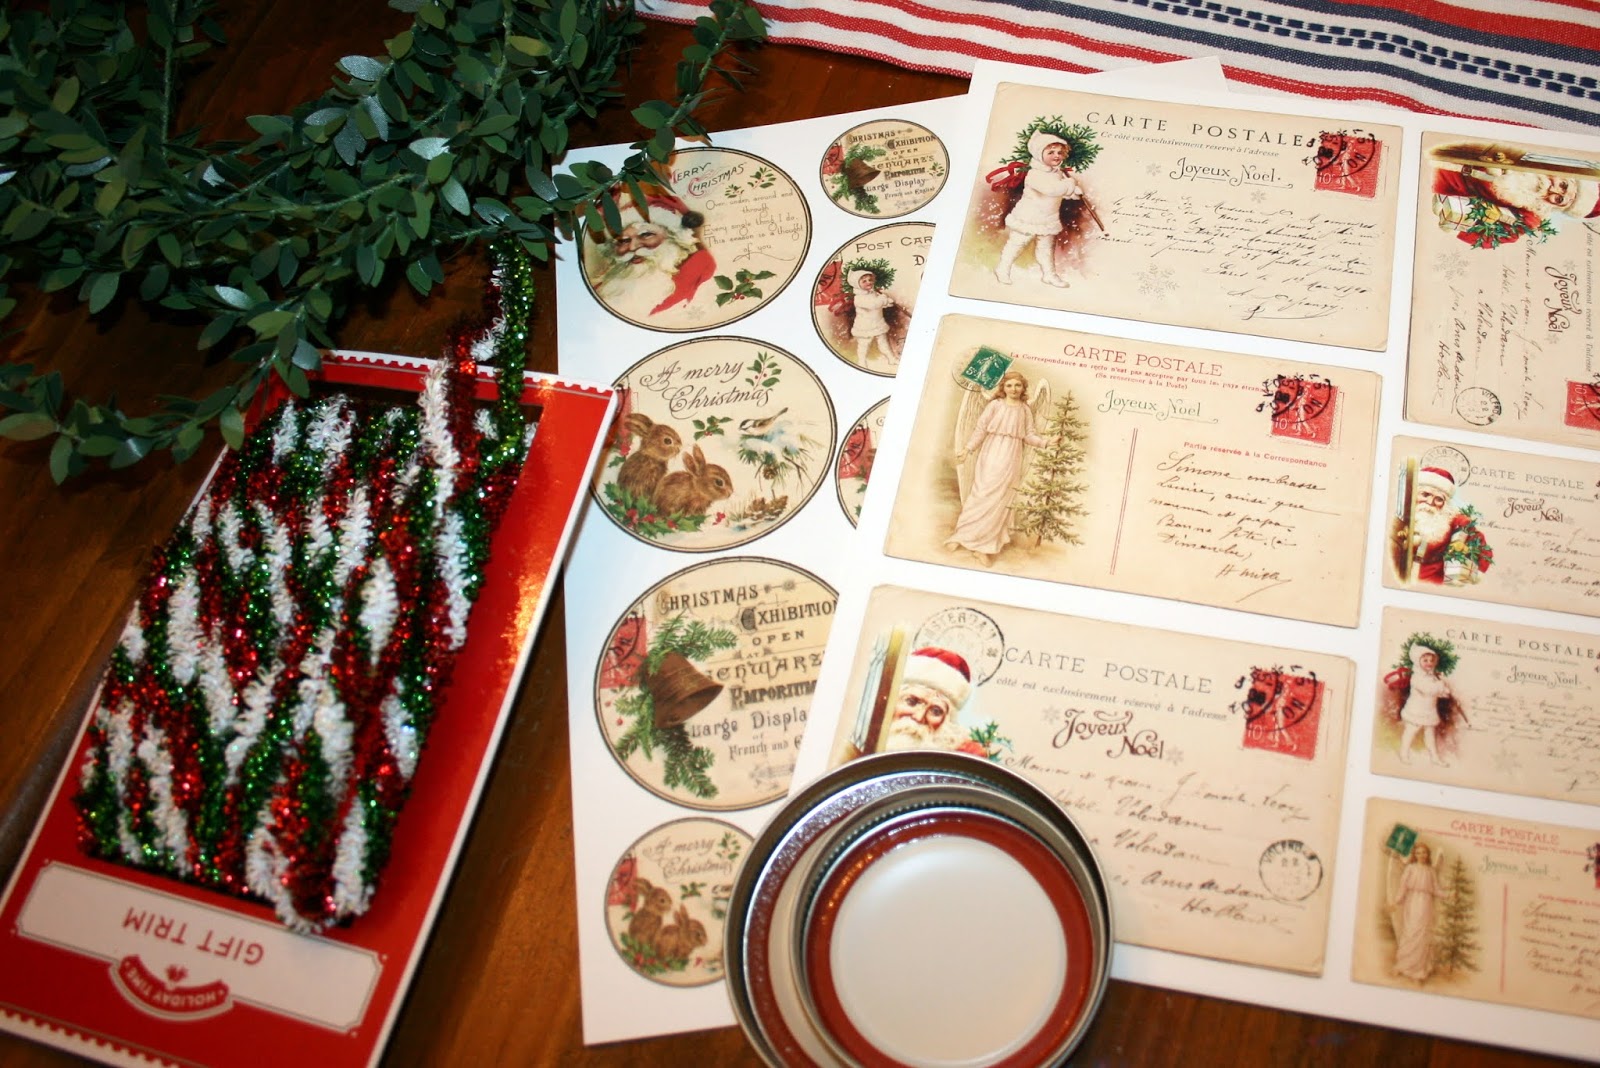
It all goes back to me finding these print outs.


I truly don't remember what I was going to do with them but, I did find a pin on my Christmas Pinterest board that used a Mason jar lid to make an ornament and, since I am still looking for things to keep me busy, that sounded like a good idea.

I wanted them rusty and, since I rusted bells and wire a few years ago with no problem, I thought it would be a no-brainer. Boy, was I wrong. Apparently, the combination of things I used last time is not really good to breathe, so I tried a few other combos this time.

The one that other people said they had actually used to rust Mason jar lids with success was vinegar and salt. So that is where I started. This was promising because I could see some rust in the water...but, even after taking them out and letting them oxidize, the water was the only place that had rust.

So then, I did what I probably shouldn't have done and threw in some peroxide. I covered it quickly and put it outside for a few days. Then, it was the same oxidizing process.


They have been oxidizing for 2 days...and, I am continually hitting them with more vinegar and, I think they are finally starting to rust. They are nowhere near where I want them but I am holding out hope...and definitely running out of patience. Lol


My brother and sister-in-law came down for 4 days over the 4th holiday weekend. They helped me with so many things that I just couldn't do on my own and then convinced me to load up on some more craft supplies just in case things start to shut down again. And so, that meant a trip to HL. They were just at the very beginning of putting out their Christmas craft supplies but the one display that had been done had exactly what I was looking for...serendipity!

And so, if I ever get the lids looking the way I want, I have my next project lined up.


I was also able to get the greenery and floral foam I wanted to put together my muslin sunflower arrangement. I gotta say that the jury is still out on this one. I like the size but I don't like the size. I know, make up my mind. I just got my late summer decor done so I am living with it for a bit. If I decide I really don't like it, I will move the flowers into the shorter, wider crock. We shall see.


And then today, this happened. Grand daughter #4 finally got to "walk" for her graduation.


Pinellas County did a lovely job of celebrating the graduates from all of their high schools...and doing so in an absolutely safe manner. It isn't what anyone envisioned graduation would ever be like but, honestly, it is more than anyone thought would happen once the virus hit and it was a chance for everyone to show their love and pride for their graduate. It's official!


And so, if things go the way I plan, I will start taking pictures tomorrow of my late summer decor. You know I am so happy because this decor is mostly sunflowers...and sunflowers make me think of what the next decor change will be...autumn leaves and pumpkins! Can't happen fast enough for me! Stay safe and stay tuned.


Sunday, June 28, 2020

Spoiler Alert...Maybe!?

With the 4th of July looming right around the corner, I am pretty sure I won't be finding any new crafts I still want to try - although, with me, you never know. I have been known to add new treasures right up until the very last moment.

But, assuming I am done - and with no more brilliant new ideas waiting for my "sunflower" decor - AND, with my Halloween gifts for friends and family already done - I am looking ahead to Christmas. I usually make package ties that can be used as ornaments for my girls and my friends. And, now that three of my grand daughters are living in their own homes and have their own trees, I have added them to the list as well. That makes for a lot of ornaments and, as I have said before, I have been crafting for so long, there aren't many new ideas floating around.

I did see something that caught my fancy so I am going to give it a try. My inspiration piece came from "Catherine Scanlon Designs". My only fear is that I may not be able to cut the wood shapes that I will need. I have a saber saw, a circular saw and a chop saw. You would think that would cover it but I no longer have a real workbench or a place to clamp down the wood and I'm just not sure I will be able to hold the wood and cut without my fingers getting much too close to the blades.


I had a scrap piece of wood that I thought would be perfect but it has so many knots that would probably "kick back" on the cuts I need that I ended up picking up two pieces of more appropriately sized wood for the project. Now I am having second thoughts about that as well. I think I can make the narrower wood work but I don't think I will be able to cut all of the way to the end meaning that I then probably won't have enough wood to make as many as I need.

In any case, I am ready for a project - an indoor project - since today's weather forecast has us well into the high 90s. Except for the cutting - which I will do in the garage, I will be in A/C. Here is where I am starting and I will take you along for the ride. Except for the wood, I have reasonable facsimiles of everything else I will probably need.


As I was pulling out supplies, I came across these images that I printed last year and just never got any further. I so remember printing them but I haven't a clue how I had planned to use them. My next big project might just be trying to jog my memory! Lol I do know that I love not only vintage images but postcards as well, so I am sure I will come up with something!


1,2,3....Yep, I've still got all 10 fingers but even I am a bit amazed that I got to get all 5 trees out of a piece of that wood. I got a bit too close to the blade on my chop saw for comfort on the last ones, but I went really slowly and wavered from the lines a bit but, with a bit of sanding, I think I will be good to go.


Next came a good bit of sanding followed by some white paint around the edges and a coat on the wooden snowflakes as well. I had these snowflakes left from something else I was going to do. I'm sure I could have found white snowflakes in the stores about now but, not only do I not really want to hang in the stores but I hated to waste them and it doesn't take long to give them a quick coat of paint. It actually took longer to snap off the little buttons that were on them. I don't know what kind of glue they used, but they definitely meant them to stay put!


I decoupaged some vintage Christmas paper on to the fronts.


And then I remembered I needed to drill holes in the bottom for the stems. I was using some cuttings from my bushes and they were about as wide as the tree so drilling was a bit precarious. I had to make a starter hole with an awl, move up to the largest bit on my Dremel and then go to the "big gun". Somehow I made it without breaking through the surface of the trees.


Next, I put more paper on the backs. It is funny how the things that look the simplest are the ones that seem to contain so many steps!


Next came the glitter on both the trees and the stars. Again, I am using things that I had so the glitter is a Martha Stewart yellow gold extra fine (although, honestly, to me it looks like antique silver) ...and it wouldn't be fun if there wasn't glitter all over everything when I got done...including me!


And then I remembered the hangers. I actually had a package of the Tim Holtz photo holders that were recommended so back to my trusty Dremel I went and drilled a hole for the holder to be inserted. I truly don't know what I would do without the Dremel. I know my large drill would do this but it is so heavy and cumbersome. I can hold the Dremel with one hand while holding the project with the other...just right! Lol


Next, it was a simple matter of gluing on the snowflake and a button. I started to put on a thin gold cord as a hanger but decided it needs a prettier ribbon so that will be on hold until I can get out again. Let's see...I have 6 months to go so, fingers crossed, I can do that. These actually were a bit more work than I had anticipated but, like you all know, I love a project...and I got one! Now I just hope I can remember where I will put them so when it's time to pull them out in December, I know where they are. Lol


Stay safe and stay tuned.

Monday, June 22, 2020

Finally!!

I can't believe the weekend is already over! We finally got to have our long awaited family reunion! We finally got the chance to celebrate graduations, birthdays, anniversaries, Father's Day and daughter #3's beautiful home renovation! But, most importantly, we were together...for the first time since Christmas!

Daughter #1 and part of her family arrived on Friday and we got to do lots of catching up before the "real" fun started on Saturday. I had planned to take tons of photos but, once again, I got so invested in the goings on that I really didn't...or, those that I did take were really just not noteworthy. But, we did get the whole group and a few other good ones so I am happy.


My brother and sister-in-law have a tradition of giving the high school graduates in our family a quilt (made by my SIL) that is full of squares each representing the special events of their lives so far. This is Olivia taking a trip down memory lane as she is looking over her gift. These are such special gifts as they will not only keep them company throughout their college years but throughout their lives as well.


This one might just have a future as a chef. She is already a good little cook and a super baker!


I couldn't end this post without showing you these flowers that were a gift from daughter #1. Many, many years ago I started giving my mom flowers on MY birthday as a thank you to her for giving me the gift of my life. Daughter #1 liked that idea so much that she started doing the same for me. The flowers that she arrived at me door with this year are an arrangement that she put together herself...with the help of the florist. She was signed up to take a class but then the virus changed her plans a bit. She was still able to go pick up the supplies and then watch a video of how to arrange all of the flowers. This bouquet is full of mostly peonies and green hydrangeas and is the prettiest thing I have ever seen! And as the peonies continue to open, they are becoming the largest flowers I have ever seen.


I did this to help you see the size of the first peony to open but I still don't think you can really tell how huge it is! And, there are still so many more to come!


So I am going to use today to catch up from the weekend and then I have friends coming tomorrow and Thursday so I am looking forward to a fun week. I also have an idea for this year's Christmas ornament so, when time permits, I will move on to that as well. And, I bought a new nozzle for the pressure cleaner so more of that to come this week too. Can you tell I am a happy camper? Lots of projects in my future. Stay safe and stay tuned.

I almost forgot to share the cute Father's Day gift idea I found on Pinterest. I made one for each of my two sons-in-law and one for my brother. Presley and I made the cookies when she was here last week.


Friday, June 12, 2020

We're Getting There

Even though I am not quite ready to decorate my home for late summer with all of the sunflowers, I somehow couldn't stop thinking about those muslin flowers that I just finished. I have already shared that they were not quite what I had envisioned them being. I couldn't zero in on how I would arrange them or what container I would put them in but, I did mention that I have some old crocks out in the yard that I sometimes use for plants.

And so, with all of that in mind, I headed out into my yard to see what I could find. I actually have two of the shorter crocks and then I found the taller one that I completely forgot about. I brought them in and had to do a good scrub down with the Clorox to get rid of all of the algae covering them.


My favorite is the taller one but, alas, I don't have any floral foam and couldn't find anything else to fill it that would help me put the flowers where they would stay and I could see the end result. That will definitely be on my list the next time I decide to brave heading out. But, I was able to get a bit of a better idea how they would look in the shorter crock and I think I am OK with it if the other doesn't work out. I will need some more greenery too but, at least I think I will end up using them so the three days of my life that I gave to this project will not have been in vain. Lol


With no other craft projects in my immediate future, I am off to do some cleaning of parts of my house that I seem to have forgotten even exist-haha. With so much company arriving next week, I think I need to be sure there are no surprises lurking. Stay busy, stay safe and stay tuned.


Thursday, June 11, 2020

The New Kids on the Block

Do you remember the 4th of July ceramic jars that I picked up the other day? I wasn't sure what I would do with them but knew I could use them in lots of ways. So, here is the no-brainer way to use them. And, since the rains have brought so many blooms to my yard, this is probably how they will be used for awhile.


And then, even though I do not really enjoy shopping online - I like to be out and see and touch what I'm buying, but... - I do follow a site called Decor Steals. They feature mostly farmhouse decor but, every once in awhile I will see something that speaks to me and I just have to have it. That is what happened with this shelf. It reads very European to me and I knew I had to have it. Where it would go was another matter but just a small glitch that I knew I could handle.

I decided on putting it in the guest bath because I have never been much of a fan of the little wood floating shelf that was in there.

But, as usually happens with me, one thing always leads to another. I thought I could just swap one shelf for the other...but, that would have been way too easy. This shelf was larger and it required some strategic moving. It might be hung just a smidge too high but it is where it had to be.

It came with the keyhole hangers on the back which work just fine IF they are put on to the piece you're hanging in the exact right place and put on straight. I find that that isn't usually the case. I will say that this one almost got the better of me. Getting it hung level and centered was a job and a half. I actually walked away from it a number of times but, giving up was not an option so, by the end of the day, it was up. And, I only put the two required holes in the wall. I usually have to try a few times and then do a major patch job. Lol


Of course, once it was up, I realized that the mirror that used to hang over the original shelf was too large to go back. It would have literally touched the ceiling and that looked kind of silly so...I am now walking around looking for any open spots to use the mirror again but, luckily, I came upon some things to move to the new shelf that work just fine, so I am happy. In fact, I am in love with this shelf.

Since my decorator daughters tell me that no one uses towel bars any more, I am thinking of taking down the rack and maybe moving the shelf a little lower and adding two towel hooks instead. I am going to live with it awhile before I decide. Until them, I love it.


My girlfriend is due in a few minutes so I am off for a fun day...who knows what we'll end up doing! I hope to be back soon with more isolation adventures. Stay safe and stay tuned.