As I was sitting at my desk today, I noticed the two vintage image wreaths that I bought and have waiting on the counter to use...one for Thanksgiving and one for Christmas. When I bought those, I also looked for a Halloween wreath. I found them in many places-all sold out. So, today I went back to revisit all of those places and it is still sold out everywhere. Since I am getting close to putting out my Halloween decor, the thought came to me that perhaps I could make one. I have always loved vintage Halloween design so I knew I probably had many images already printed that I could use. When the grand kids used to come for weekends of holiday fun, I always got way more supplies ready than we could ever use and so today those supplies came back to visit. I also have a number of digital books full of images so if I was missing something it was a simple task to print what I needed.
I started by getting an approximate wreath size on brown Kraft paper. At this point I really hadn't even thought how this would play out. I gathered up my images and began "playing". It sort of looks like I "chewed" the paper but I knew I would be trimming it so I just did a super quick cut. Lol
At this point I picked a Halloween patterned card stock and slipped little pieces in under the images where I could see the background paper.
I used a glue stick to just kind of set the images in place but not totally adhere them-just in case. Lol I cut away the extra paper so I could begin to see the wreath shape.
Then I got out my Martha Stewart fine glitter in gold, orange and black and began outlining and filling in certain parts of the wreath.
So this is where I am right now...definitely not done yet. I think I need a lot more glitter and I know I need to mount this on something more sturdy. I think I will run out tomorrow and get a piece of black foam board and it should be an easy task to just attach and trim to shape.
But, it's getting late and I am ready to sit down and put my feet up so part 2 will happen tomorrow.
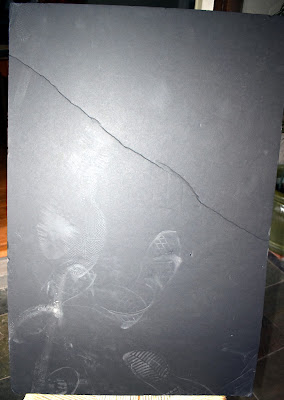
Here comes part 2 of what might turn out to be a record breaking post in terms of length. My day started with a trip to WalMart...not my favorite place on earth but the closest to me that I knew would have black foam board-I really didn't want to head out to the other side of town. Apparently I don't go to WalMart enough to even know that they are doing a major "renovation"...their words not mine. It really just looks like they are moving everything but...whatever. The areas that have been moved seem to be stocked relatively well but the ones that haven't been moved yet are being left to empty out and not being restocked until they do move. And, of course, the office supply area where the posters and foam core are looked like a storm had come through. There was ONE sheet of foam core available and luckily it was black...but, it looked like this:
I battled with myself but, in the end, this was better than driving across town and, I only needed a portion of it so I thought I would be good. I sprayed the back of the "paper" wreath with spray adhesive and adhered it to the foam core.
Then, the fun began! I had forgotten that I "lent" my self sealing cutting mat to a grand daughter and haven't gotten it back, so I improvised with that, put a new blade into my Exacto knife and began cutting away the extra foam core.
Even with a sharp blade, the foam core doesn't cut perfectly on rounded areas so I took an emery board and filed down the rough edges a bit...and still wasn't 100% happy with it so I grabbed the black chalk paint and gave it a quick coat. Something still didn't look right so I went ahead and glittered all of the cut edges.
And, it was right about then that I decided that I think I am actually going to like this-I wasn't totally sure up to that point.
Then, after the edges dried I began going back and adding orange, black and gold glitter to other areas of the front. I love glitter for Halloween-the more the merrier!
The hardest part of these steps is the waiting. The glue goes on fairly heavy so it takes awhile for it to dry all the way through. While I waited, I looked for what kind of a hanger I wanted. Since I really don't know where it will go or if it will even end up being hung, I decided I did not want to drill a hole through it as my other wreaths are hung. In this case, just some ribbon hot glued on the back seemed like the answer. This way if I prop it somewhere, the ribbon can just hang to the back.
So here we are in all of our pretty!
I'm really loving this wreath. I looked for one for Valentine's Day, St. Patrick's Day and Easter and, at the prices that I found, it looks like I might be doing this a few more times. Lol Stay safe and stay tuned.


No comments:
Post a Comment