Definitely not as easy as it looks. Or, maybe when I see it on TV they are just applying the grout to new tile applications...not having to remove old grout first. I am mid way through day two and I already have blisters on both hands! Holding that grout saw is a job. Not only do you have to apply a fair amount of pressure but, like in most construction projects, there are places where the tool can not go the way it is intended and you end up having to use a less dominant hand and turn the tool any way possible for it to fit. But, I am moving along.
I have learned a few lessons along the way.
1: this is not something that I would enjoy doing every day of my life...more power to those who do. I am sure the more you do it, the easier it might become but, right about now, I am happy knowing that I will probably never have to do this again in my lifetime!
2: read directions...don't just watch You Tube...unless, the video is using the same supplies that you are. I watched a video about removing old grout...although the guy was using a totally easier tool than I have. He also was using dry grout mix so all bets were off on details like...don't get any moisture on the tiles! When I finally read the directions on my container of pre-mixed grout, the first thing I see is "wet the tiles". Hmmmmm
3: it is sometimes better to pay more for convenience. In this case, I really lucked out. I just knew that I was going to go the easiest route possible (short of paying someone else to do it...Lol). I didn't want to have to keep mixing grout. It just sounded like a step I could avoid so I grabbed the pre-mixed stuff even though it was kind of expensive. Then, when I got the first section done yesterday, I googled the differences between the two kinds of mixes...I know, a bit late but I am that "measure once, cut twice kind of a gal"...and I found out that the one I am using is so much superior-at least if you are a novice and don't really have a clue what you are doing. It is mixed with granite particles so it will not crack, it is stain resistant and it doesn't have to be sealed! One less step is definitely worth the extra expense. Sometimes you get what you pay for!
4: it takes a bit more muscle than you might expect to work the grout down into the lines but, again, because I am using the pre-mixed, cleaning the tiles is easier and this grout doesn't leave a film.
By the time I am done. I will probably have learned even more but I thought I would check in because the "after" picture will still be awhile in coming. As I post, I have most of the next section "sawed" and will be applying the grout after a lunch break. Oh yes, one more thing I learned. It is probably a good idea to lay down a drop cloth because no matter how careful you are, some of the grout will definitely hit the floor. But then again, it was an easy clean up-and I waited until I was completely done grouting and still no issue.
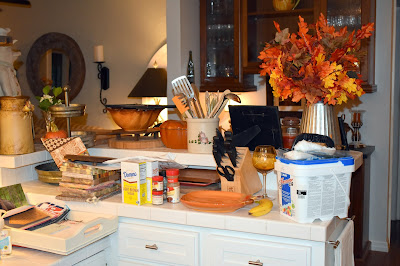
The hardest part...after everything I just said...is not having full use of my kitchen. I think I can start putting things back on the first section but not actually use the counter just yet. I did put down a towel when I made my coffee this morning because I sure didn't want any coffee splashes to hit that new grout if it isn't fully cured. Everything is a bit of a mess but I guess that goes with the territory.
It is really hard to get pictures with all of that white and artificial lighting because it's raining today but I think you might be able to see some of the grout removed in this picture.
This is the sink side that I am working on now so this will probably be the most challenging...but, I will get there. After this is just the desk and bar area and I can live without those for awhile. I also decided not to do the back splash. There are a few areas that get spots but nothing like the counters so I am giving myself a pass. I really think that working on a vertical surface would be so much more difficult so, I am just going to give the walls a good bleach scrubbing in a week or so and go from there. After that, I will be emptying all of the cupboards...one section at a time...and repainting the inside and relining the shelves. Wow...talk about a project! I need to be careful what I wish for. Lol Stay safe and stay tuned.


No comments:
Post a Comment