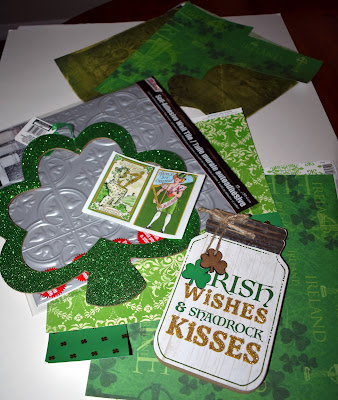
Even though my decor is still Valentine's Day, I am ready to move on and begin to think about St. Patrick's Day. I just finished looking back over last year's blogs and I must say, I just love green so much. I think if I could only decorate with one color, it would have to be in green and all of its beautiful shades. I was talking to my brother about getting some dates on the calendar and he was the one that broke the news to me that Easter falls on March 31 this year. An early Easter happens every so often and it does make me question putting out my St. Pat's decor when, after taking it down and putting out Easter on March 18, it won't have all that long to be out. But, that being said, there is NO way I would skip St. Patrick's Day so...I am starting to get some new crafts found and actually already done.
When I last ran by $Tree, I grabbed a St. Pat's Mason jar. It actually wasn't horrible but I wanted to be crafting so it was perfect for a simple re-do.
All I actually did was sand off the glitter, paint some antique wax on the Mason jar "lid" ,scuff it up a bit so some of the original metal still showed, ModPodge on a piece of St. Pat's scrapbook paper cut to shape then added a free downloaded image and re-attach the little shamrocks that were on the original...simple but, I think it will look cute in my kitchen maybe propped in the old carpenter's box.
And then I was on to the glitter shamrock shape that I had left over from a craft I did sometime in the past. I think it had something hanging in the middle that I used for something else but I truly have no clue what. Lol Since I seem to be "hooked" on the faux $Tree tile crafts...and, spoiler alert, there is an edd probably coming soon...I decided to go that route. I cut a shamrock out of poster board so that I could glue it into the middle of the glitter shape so I would have a flat area on which to add my image.
I also traced and cut the heart shape from the tile, cut out the center and gave it a coat of green chalk paint. And then, it was the same old, same old...a bit of sanding, some grunging with the antique wax and then the cinnamon-ModPodge treatment and then another round of grunging with Tim Holtz distress ink and black ink.
While that was drying, I added some ink to the image so that all areas of it would be filled in when it went behind the cut out of the tile. And, this might be a good place to add my feeliongs about those blending brushes I bought the other day. I have seen crafters use them for a long time but I always just used a small make-up sponge and thought I was fine. Well, I was wrong...I wasn't fine. These blender brushes are incredible! The set I bought came with 4 different sized brushes so no matter how large or small the area you are blending, they have you covered. I actually thought they were just little rubber spomges on the end of sticks but, they're not. They actually have bristles but I couldn't begin to tell you what those things are made of...they are soft and wonderful and do the job of blending so much better than I ever accomplished the other way. And no, I am not getting a kick-back from them...just really excited to have found something new that actually isn't all hype! Lol
Then it was a simple matter of gluing everything together and embellishing. I used rusty wire for the hanger and then made another messy bow from ripped strips of St. Pat's fabric. It still didn't look finished so I added a scrapbook shamrock embellishment to the bow and then glued some small shamrock "confetti" onto pieces of rusty wire, "squiggled" the wire and inserted them into the bow.
I think I like it! So now I am truly off to begin to take down the Christmas tree. I have honestly had the hardest time doing that this year. It just makes the family room so warm and cozy and with the weather we have been having, we need all of the warm and cozy we can get. I'm thinking that if I had the usual "real" tree that this would have happened a long time ago so I guess that is one more reason to embrace the artificial tree. But, come on, enough is enough! Lol Stay safe and stay tuned...and I'll be back with more of the home tour soon.
I almost forgot to show you...here is where the "Be Mine" sign ended up after it lost its home to the new heart that I made on the top shelf of the baker's rack. I will say, I never really liked it there after I added the poster of Valentines so I think it may be here for awhile...or at least until I get another idea.


No comments:
Post a Comment